

Conversations help you manage support requests, feedback, and communication with users in a centralized, organized way. Whether it’s a customer question or internal user feedback, Conversations are designed to streamline interaction and resolution inside your product.
What is a Conversation?
A Conversation is a threaded message exchange between a user and your team. It can be triggered from different sources, like:
A chat or help widget embedded in your app
A contact form submission
A manual conversation created by a support agent
Programmatically via the API
Each conversation includes message history, timestamps, tags, status, and assigned teammates.
Receiving Email in UserDeck
For emails to be received in UserDeck, you will need to forward emails received at the email address you want to connect to a unique address created for you by our UserDeck system. This is a mandatory step and is required for you to see any emails for your email address come through inside the UserDeck system. This is currently the only method for connecting your email account and ensuring that UserDeck can see all of the emails received in your account, so please make sure that you complete this step. Instructions to complete this are described below.
Sending Email using UserDeck
When you reply to a conversation in UserDeck, you have 3 options for what our application uses to send a reply:
UserDeck Mail System - our internal mail system will be used to send email replies. This is the default method and is what is used when a new email account is added to UserDeck. This will work out-of-the-box to send emails; however, deliverability may not be optimal until you complete some setup steps to add SPF, DKIM, and DMARC records to your domain to work with the UserDeck mail system. Gmail, Yahoo, and many mail systems implemented increased requirements for email accounts sending from your own domain in 2024, which means you'll need to set up SPF, DKIM, and DMARC if you haven't already. For more information about why adding these verification methods is important for email deliverability, please see this article: https://www.mailgun.com/resources/research/email-authentication-requirements/
Gmail / Google Workspace - We will use your G Suite / Gmail account to send email replies. You'll need to authorize your Google Workspace account by logging in via OAuth and granting UserDeck access.
Custom SMTP - if you have a different email host and want to send your replies from UserDeck using that email system, you'll need to find your SMTP details from that host and enter them inside the UserDeck system.
More information about these sending methods and how to configure them can be found in the outgoing email article linked below.
How to Set up your Conversations (REQUIRED)
To get started, ensure that your plan includes conversations, then follow the steps in each linked article below to ensure full functionality:
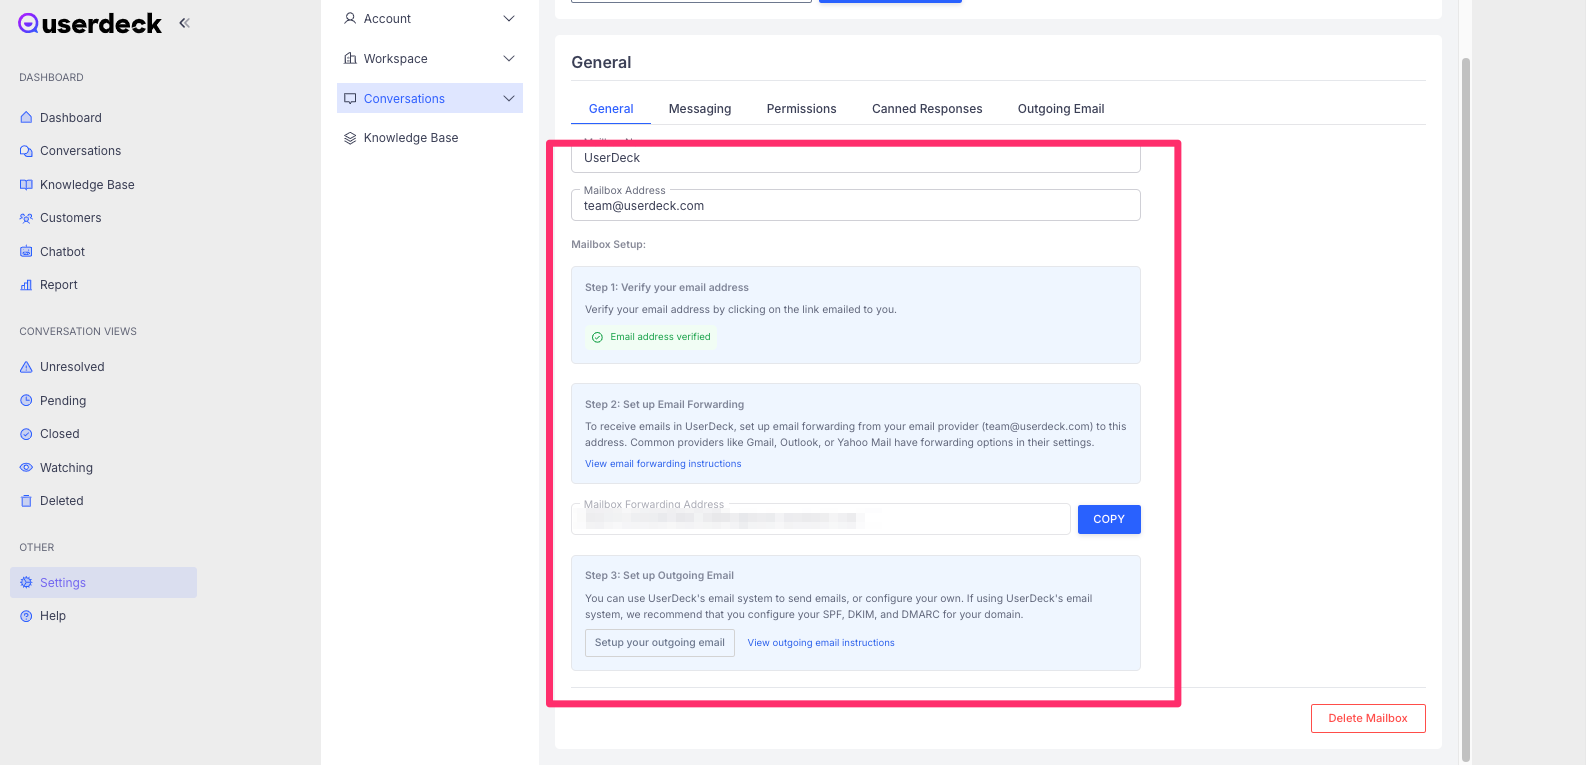
Step 1: Add a mailbox - add your email to our system
You can do this by going to the settings page:
![]()
Step 2: Set up mail forwarding - to ensure UserDeck can see all emails received in your email account, you'll need to set up forwarding in your email account to forward all emails to a unique UserDeck address for your email account. Follow the instructions in the linked article.
![]()
Step 3: Set up outgoing email method - you can choose from 3 different sending methods. By default, we will use UserDeck's mail system; however, there are setup steps required for all of our sending methods. Make sure you follow the instructions in the linked article for your preferred sending method.
Step 4: Invite Team members - Add support agents or team members who will manage incoming conversations.
Step 5: Install Chat widget on your website - Embed the chat widget inside your web or SaaS application to allow users to start conversations with you.

Once you complete the above steps, you'll be ready to start using Conversations and send and receive new messages.
How to Start a Conversation
For most conversations initiated by your customers or users, you won't need to start the conversation; it'll come into your conversations area as a new ticket. Here's what happens:
Users send you an email at your email address, send you a message via one of your connected channels, or they submit a ticket via the UserDeck chat widget that you've set up on your site or app.
The conversation thread begins automatically and appears in your admin dashboard.
If you'd like to start a new conversation with a customer, you'll need to be logged into UserDeck and follow these steps:
From the Dashboard (Admin-Initiated):
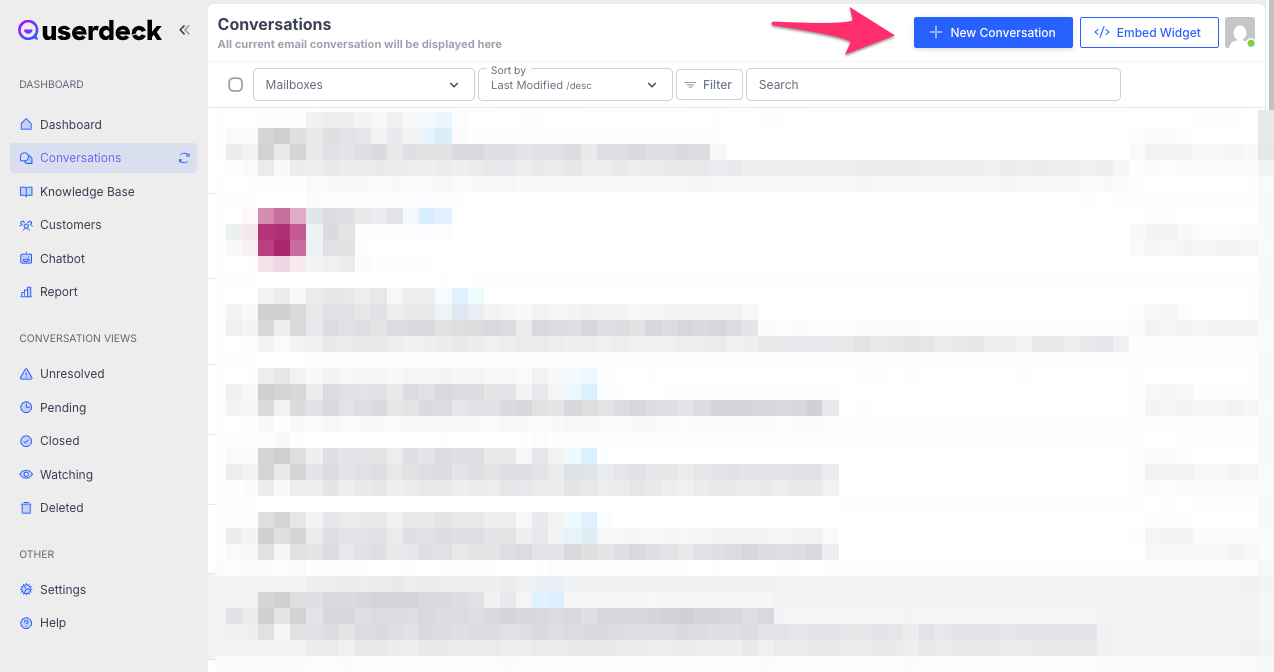
Go to the Conversations section of the dashboard.
Click the "New Conversation" button
![]()
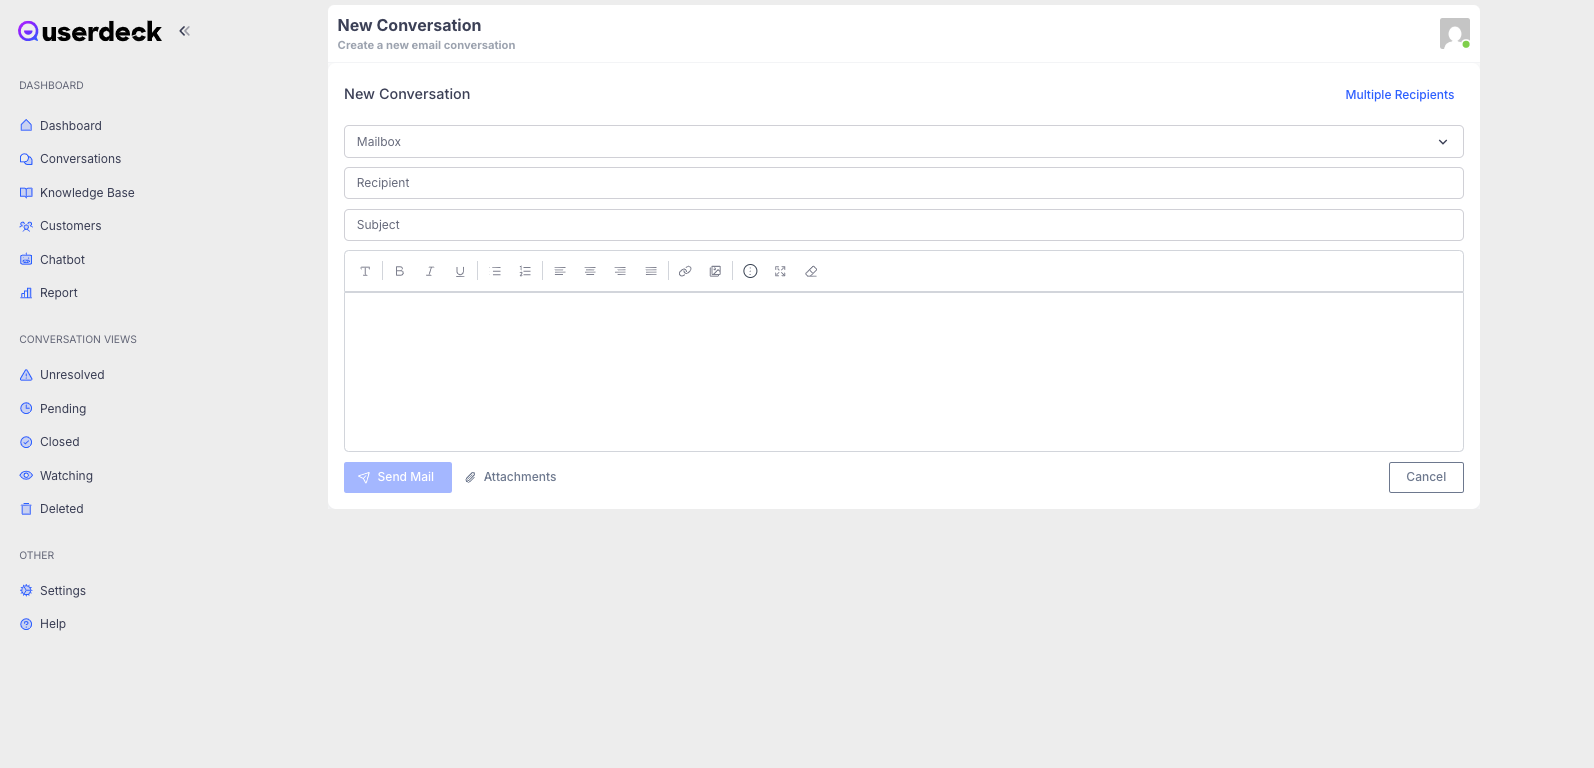
In the compose screen that appears, enter the email address or recipient you want to start a conversation with and enter your message.
![]()
Then click the send— UserDeck will send a message to the recipient using your configured send method.
Best Practices for Conversations
Respond promptly - Users expect fast responses—try to reply within minutes, especially during working hours.
Use saved replies - Create canned responses for frequently asked questions to save time and maintain consistency.
Tag for insights - Add tags like “Bug”, “Feature Request”, or “Billing” to analyze trends later.
Assign wisely - Route conversations to the right agent or team using rules or manual assignment.
Follow up - If an issue isn’t resolved on first contact, be sure to send additional follow-up messages if needed.