

This guide explains how to forward emails from your existing email account to UserDeck, allowing you to manage all customer conversations in one place.
IMPORTANT NOTE: This is a REQUIRED step to complete the setup of your email account with UserDeck. If you do not complete this step, no emails will be displayed in the UserDeck system.
Currently, this is the only method available for UserDeck to see emails that you receive via the email address you are adding to UserDeck. UserDeck will provide you with a unique forwarding email that you will need to configure your email platform to forward all emails to. Once we receive an email at that unique forwarding address, our system will process the email, and it will appear as a conversation in UserDeck.
Prerequisites:
You must have added your email account/mailbox to UserDeck already, using the instructions in this article: How to Create A New Mailbox
How to Set Up Mail Forwarding
Follow the steps below to retrieve the unique email forwarding address you'll need to forward all emails to.
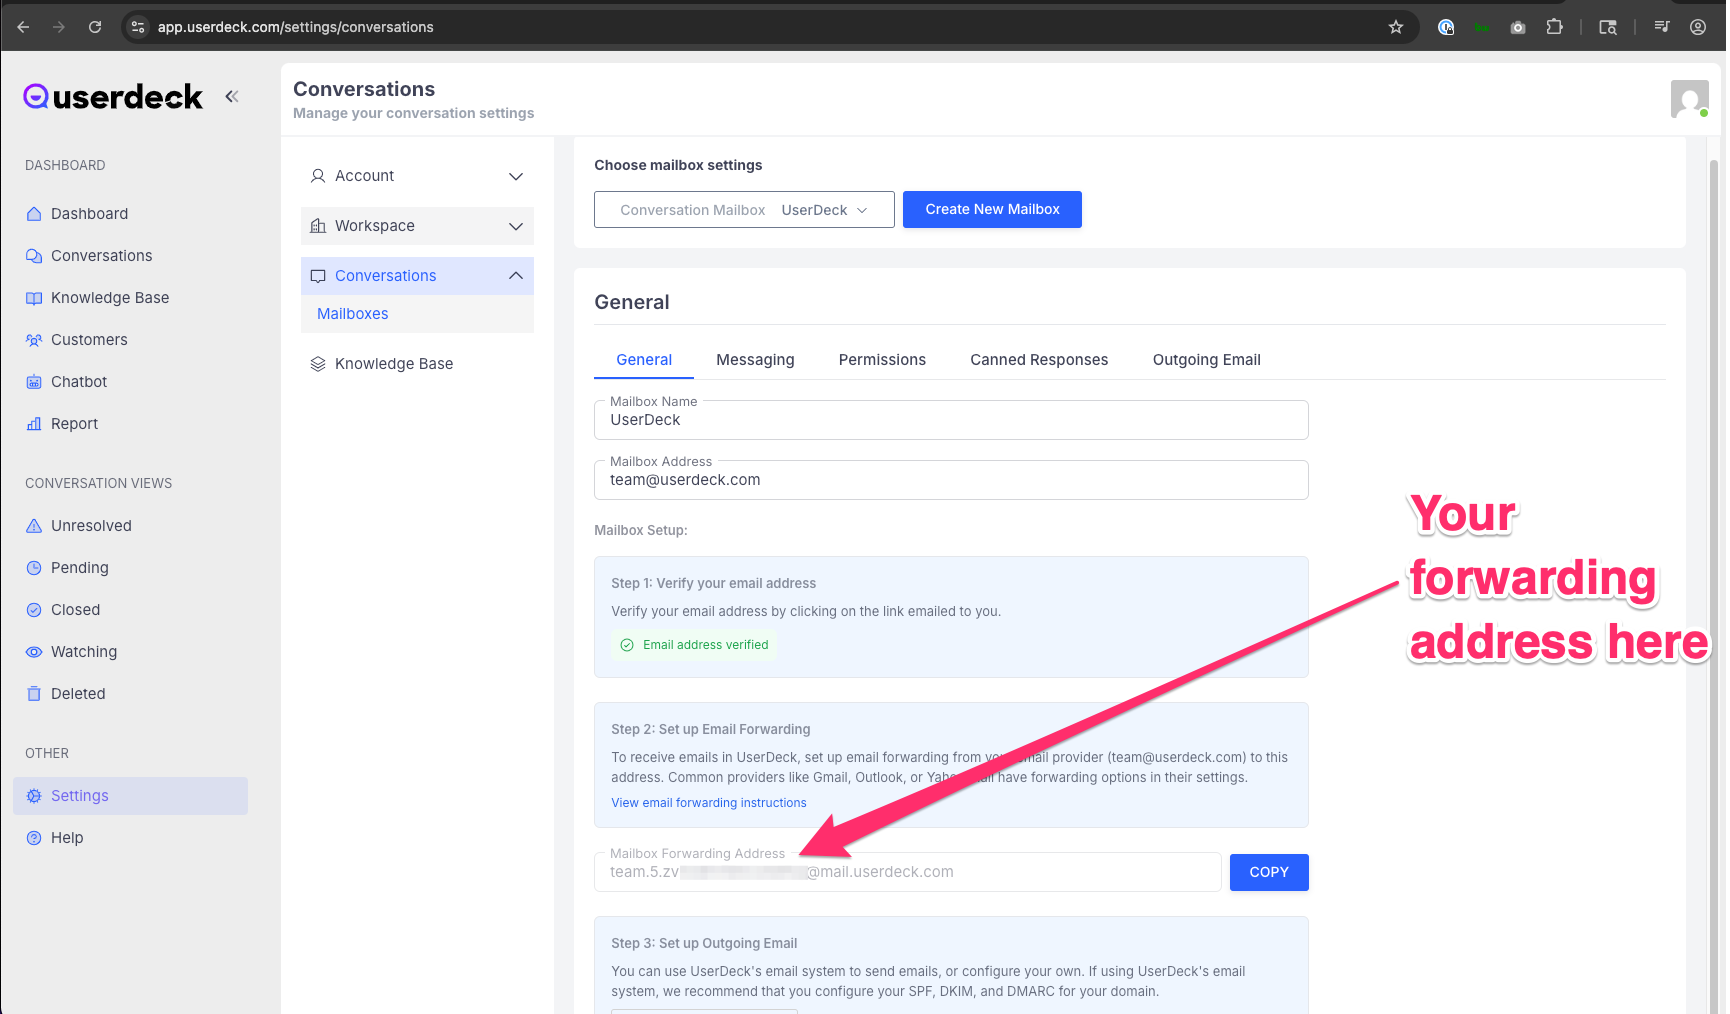
Step 1. Locate Your UserDeck Forwarding Address
Log in to your UserDeck account.
Navigate to Settings > Conversations > Mailboxes.
Find your Mailbox Forwarding Address (e.g.,
your-mailbox.random-strings@mail.userdeck.com):![]()
Copy this address and save it for use in the next step when you configure mail forwarding with your email provider.
Step 2. Configure Forwarding in Your Email Provider
Use the forwarding address from Step 1 in your email client of choice. You'll need to enable forwarding of all mail to the custom forwarding address provided to you by UserDeck in Step 1. Below are instructions for commonly used email providers. If your email provider is not listed here and you need additional support, please contact your email provider's support for detailed instructions on how to enable email forwarding:
Gmail
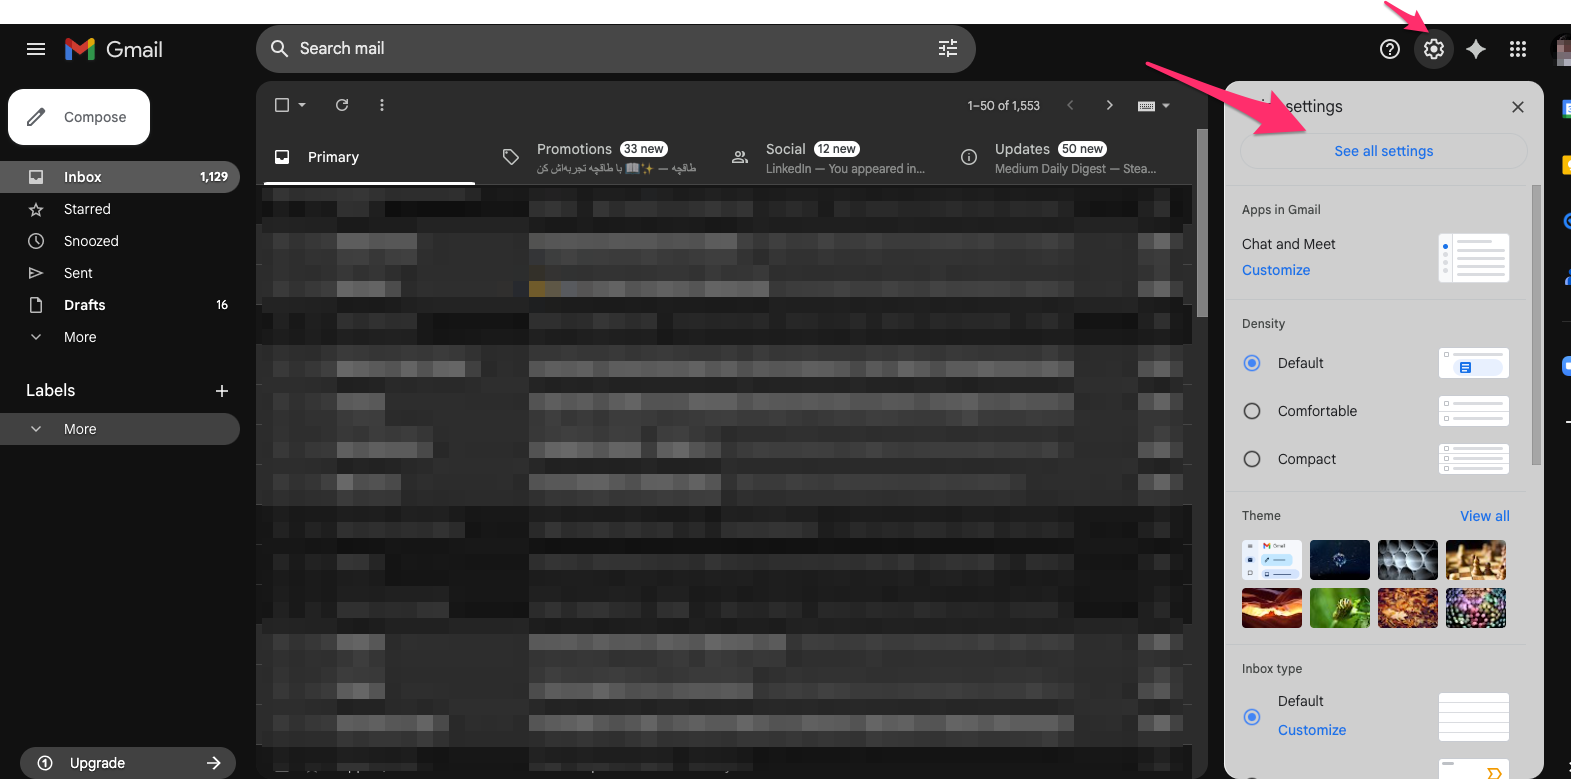
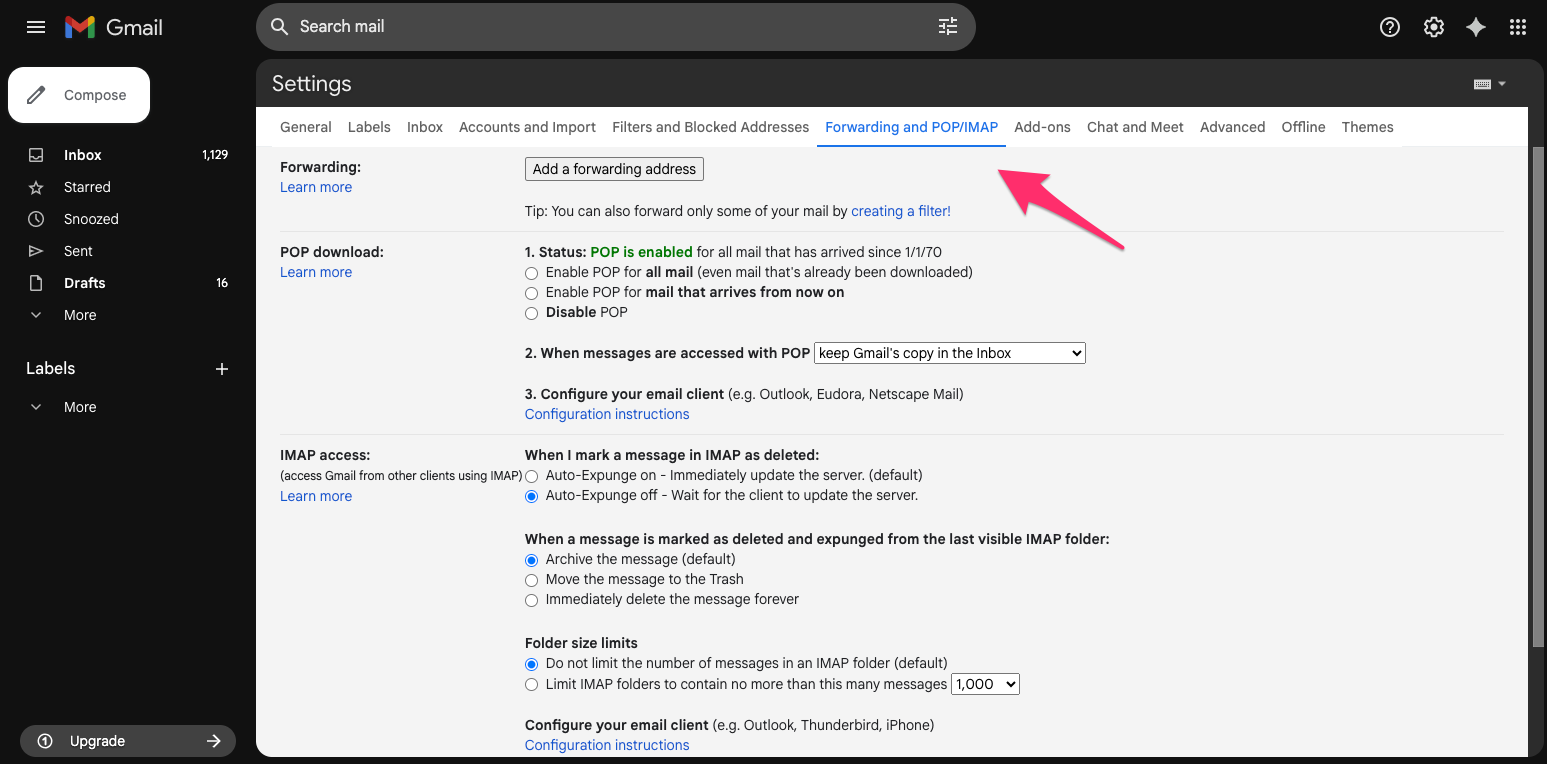
Go to Settings > See all settings > Forwarding and POP/IMAP.
![]()
![]()
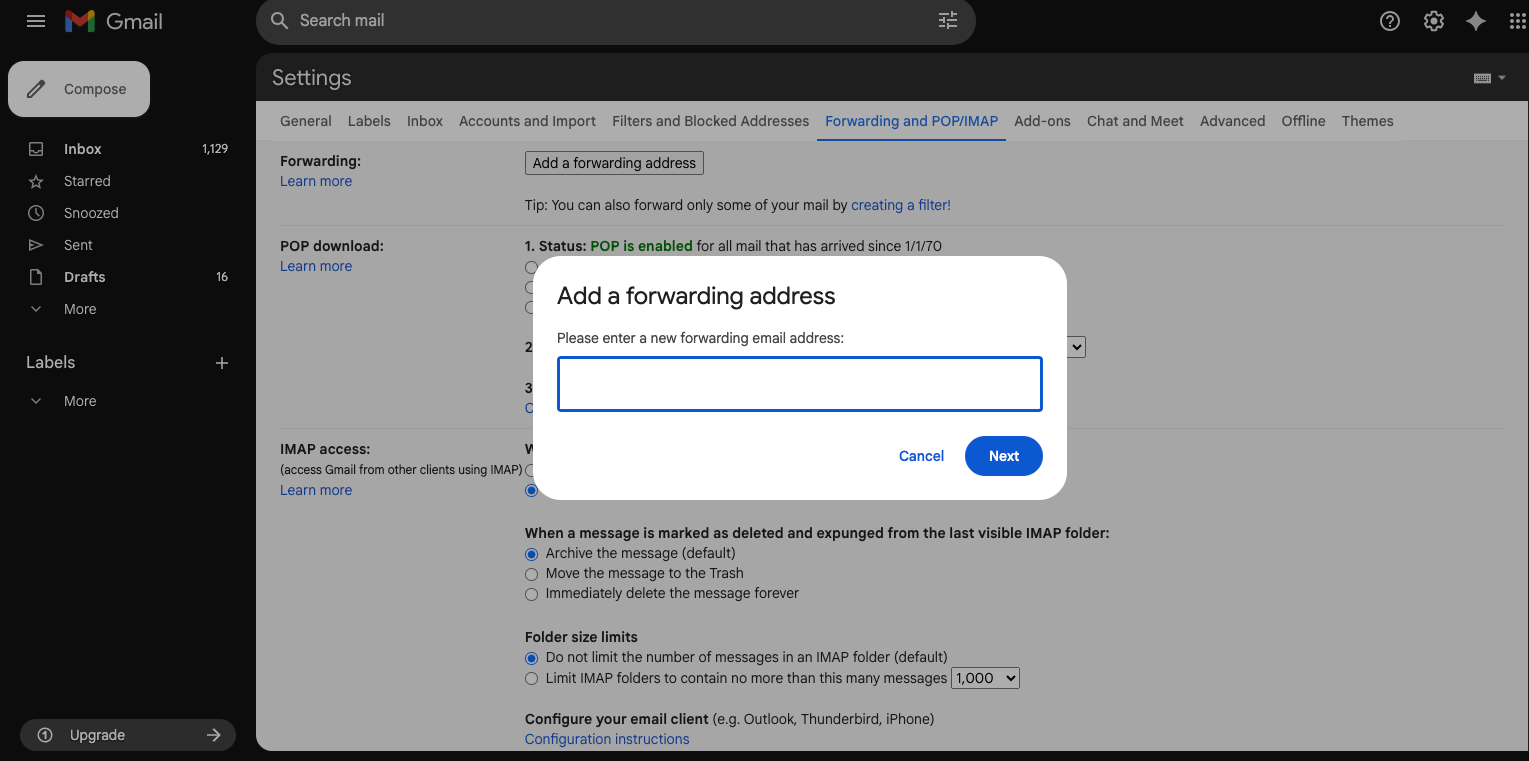
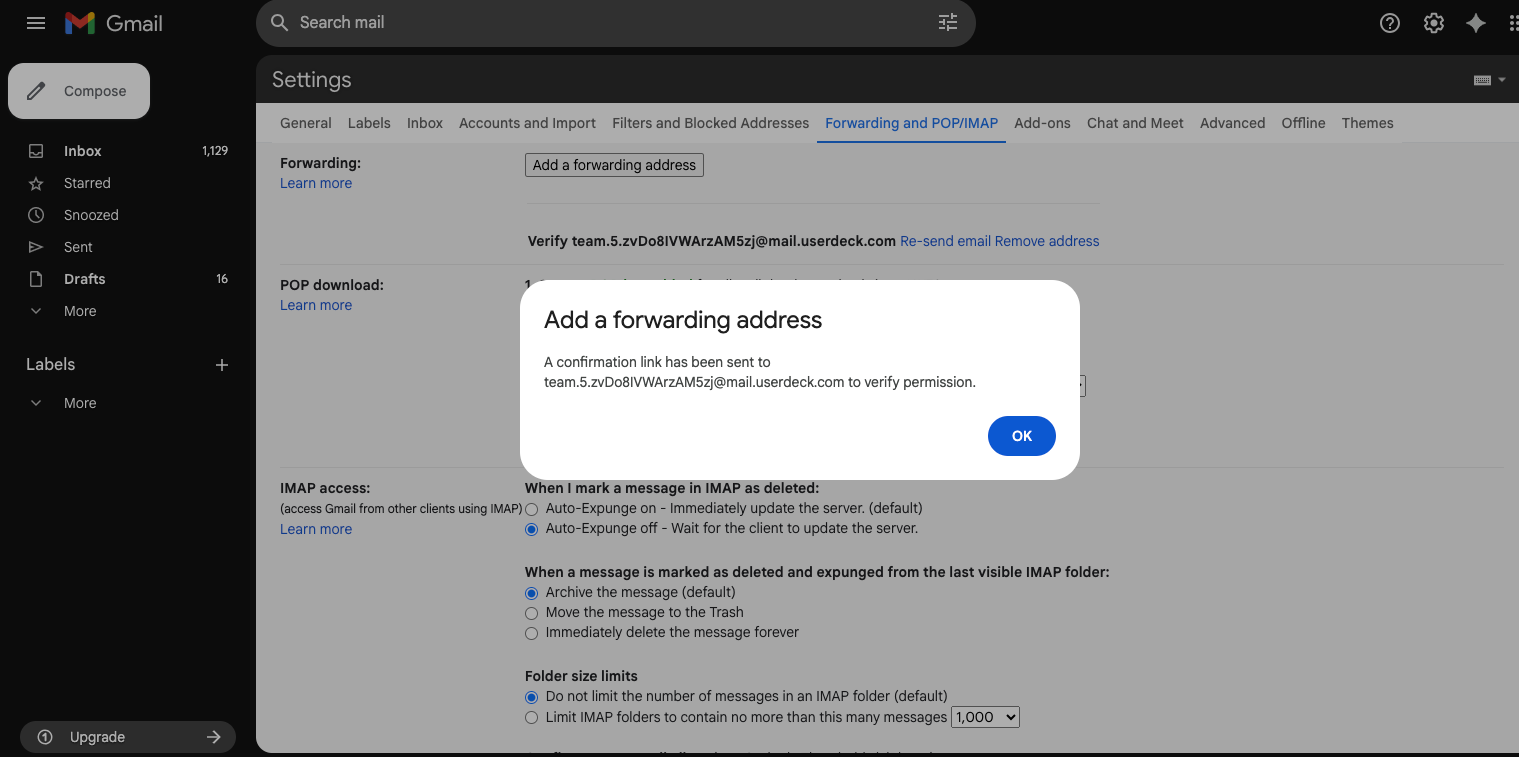
Click Add a forwarding address.
Paste the UserDeck address.
![]()
Verify the forwarding address using the confirmation link sent to the UserDeck mailbox. Note: the verification email should appear in your UserDeck Inbox.
![]()
![]()
Select your desired forwarding behavior (e.g., forward all or apply filters).

Yahoo Mail
Go to Settings > More Settings > Mailboxes.
Choose your desired mailbox.
Scroll to the Forwarding section.
Paste the UserDeck address and save.
Outlook / Hotmail
Navigate to Settings > View all Outlook settings > Mail > Forwarding.
Paste the UserDeck address.
Choose whether to keep a copy of forwarded messages.
Click Start forwarding.
iCloud Mail
Go to Settings > Rules > Add Rule.
Set condition: If a message arrives.
Set action: Forward the message to the UserDeck address.
Save the rule.
AOL Mail
Go to Options > Mail Settings.
Locate the Forwarding section.
Paste the UserDeck address and save.
Other Providers (e.g., GMX, Mail.com, Zoho, Yandex)
Look for options like Forwarding, Filters, or Mail Rules in settings.
Paste your UserDeck address and save.
Step 3. Test Emails are Received in UserDeck
Send a test email to your email address that you added to UserDeck, then check your UserDeck inbox to ensure the email appears.
Troubleshooting Tips
Verification: Remember to complete any required verification steps to set up email forwarding by your email provider. Email forwarding cannot be turned on in many cases until this verification is complete.
Ensure Email Forwarding is turned ON: sometimes, you may have added the email forwarding address, but the setting to turn ON email forwarding was not completed. Reload the settings page in your email provider and ensure the option is turned on.
Filters: Use filters if you only want certain types of emails forwarded.
Verify Emails are Received: Test your setup to ensure emails reach your UserDeck mailbox.
With these steps, your team can automatically collect and respond to support emails through UserDeck—making your workflow centralized and efficient.